January : Hand-Pencil
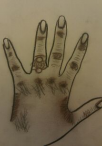
For this I was kind of unsure about how to do this, but once I got my shading right, it was pretty much cool. Personally I don't like my hands because I have very dark knuckles and I made sure that you could see that in my photo. This is one of my beginning photos, my shading does get better.
January : Self Portrait-Pencil
This is my self portrait that I drew, I hadn't got the technique of shading and such down, so its still a bit raw. So the different things I started to pick up and recreate were my nose, the way my hair was going to be put into bun, which hair was sticking up, the sides of my glasses, the way my mouth curved down on my top lip etc. Byt he time I finished and thought I did a good job, but really , I look more like a grandma.
February : Full Body-Charcoal
This is one of my favorite things to draw because it gave the realistic feelings of being in a professional art class, drawing our model. it was cool that we all did it from different angles and used charcoal as our medium. I also like this because this is where I start to find my artistic patterns, I draw boldly. This is the first of my projects to be done with my style to it.
February :Still Life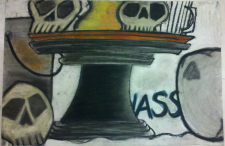
This to me was the hardest to draw because you had to look at every single detail in the picture. For example, I chose where I wanted to cut off my picture at, but I forgot that on the other side of the skull at the bottom there is Orange vase that reflects of the metal paint can. In here you can also see my artistic style, the boldness of the pieces.
March :Clear (Small)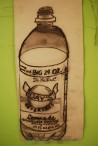
March :Clear (Big)
I was really surprised when I pulled it this off, and it actually came out nice. in this bigger one you can see the boldness of my artwork and the personality of the painting.
For this project my artist that inspired me was Andy Warhol, an American Painter who was a leading figure and well known for the visual art movement, pop art.
Some of his famous painting include the
Campbell's Tomato Soup, the lovely
Marilyn Monroe , or the late great
Michael Jackson.
Andy Warhol and Nicki Minaj inspired me to do these three pieces pieces simply because I love them both. From their style to their way of life, and ultimately the talent that they share with the public. These are,
"The Artists' That Inspire".